How to strap an ankle
Now that we’re in the middle of the winter sport season, we are seeing a fair few ‘niggles that have turned into something more’ here at Inspired Physiotherapy.
Ankle injuries are a relatively common occurrence, and rigid strapping is one of the ways we provide support and security for an ankle when returning to sport and in order to relieve pain.
Ultimately rigid strapping provides an artificial support structure – it is not a long term solution, and strengthening the surrounding muscles and regaining proper range of motion are critical to the rehabilitation process.
So with all that out of the way – here is how to strap an ankle after an inversion injury (rolled ankle)! It is possible to strap yourself, although we recommend getting someone to do it for you (friend, parent, team mate, or physio) as it tends to be a more solid taping.
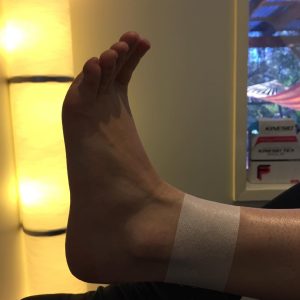 Step 1: Place an ‘anchor’ strip around the top of the ankle – we often use fixomull (the white tape) as it has some stretch and won’t cut off the blood circulation to your foot

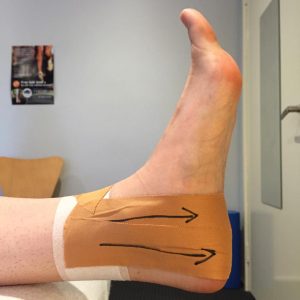
 Step 2: Place two to three ‘stirrup’ straps, starting on the inside and moving to the outside of the ankle. This provides the rigid support that stops painful inversion (rolling outwards). It’s important to go from the inside to the outside ankle.
 Step 3: Place one to two ‘figure of six’ straps, starting on the inside of the ankle, loop under and around the foot / heel, finishing at the starting position.
 Step 4: Place a second ‘anchor’ strip around the top of the ankle using white tape (fixomull), to keep the ends of the stirrup/figure of six taping from coming undone. Remember to rub the tape as the heat from the rubbing will activate the glue and make the tape stick.
Step 5: Admire your handy work!
The tape can stay on for 2-3 days maximum and should be taken off if you feel any pins and needles in the foot or itchiness under the tape. The tape is also waterproof and will just feel soggy as it’s drying.


")
